Getting Started
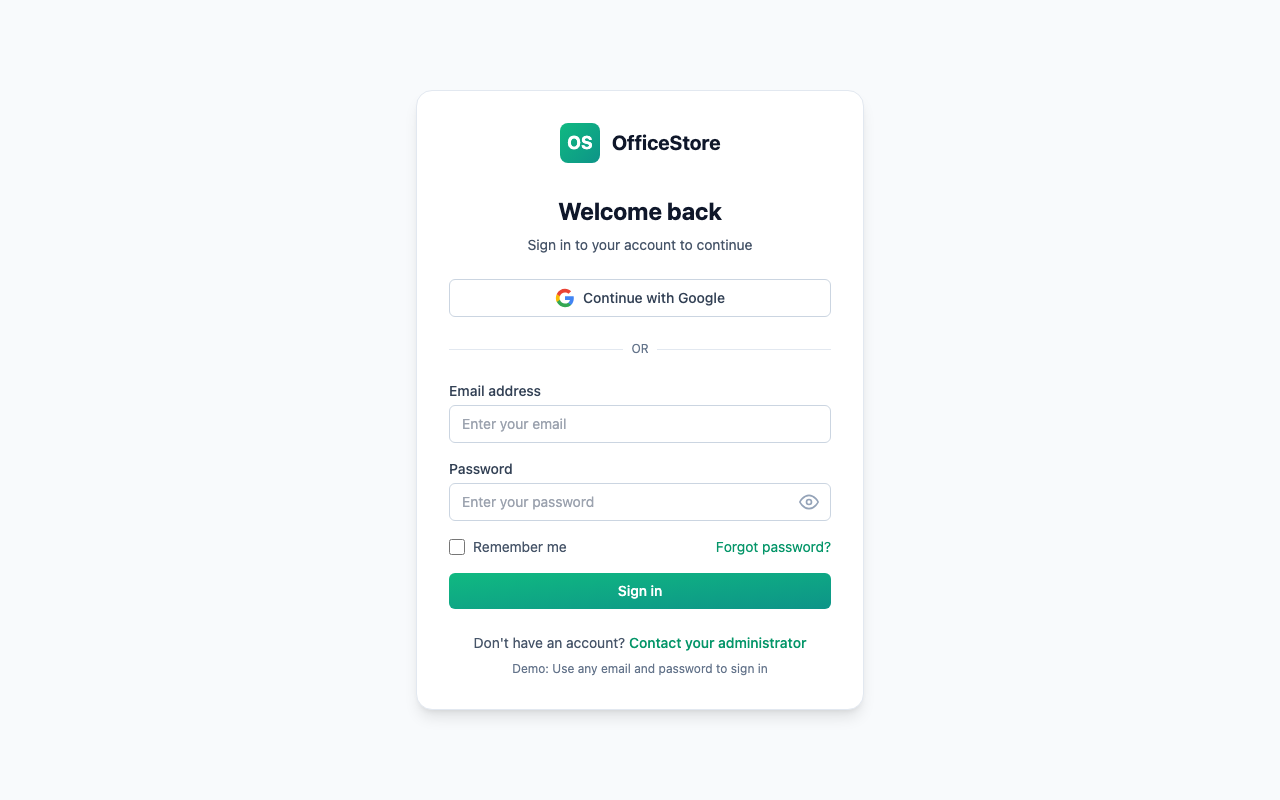
Logging In
- Go to your organization's OfficeStore URL
- Enter your email and password
- Click Sign In
Screenshot: Login page
First-Time Setup
For New Organizations (Admins)
If you're setting up a new organization, you'll be guided through an Onboarding Wizard that helps you:
- Configure currency settings
- Create your first site and areas
- Set up the central store
- Add initial catalogue items
- Invite team members
See the Onboarding Wizard section under "For Administrators" for detailed steps.
For Existing Organizations (All Users)
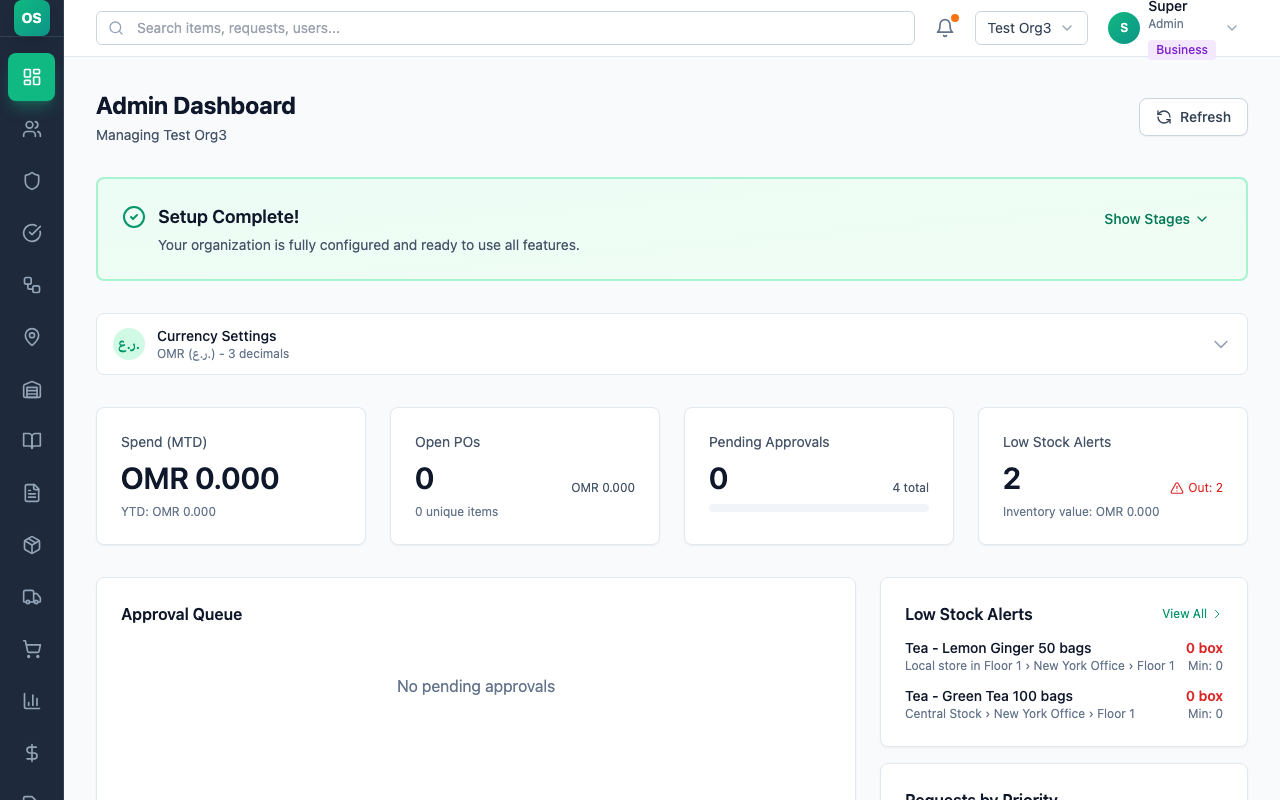
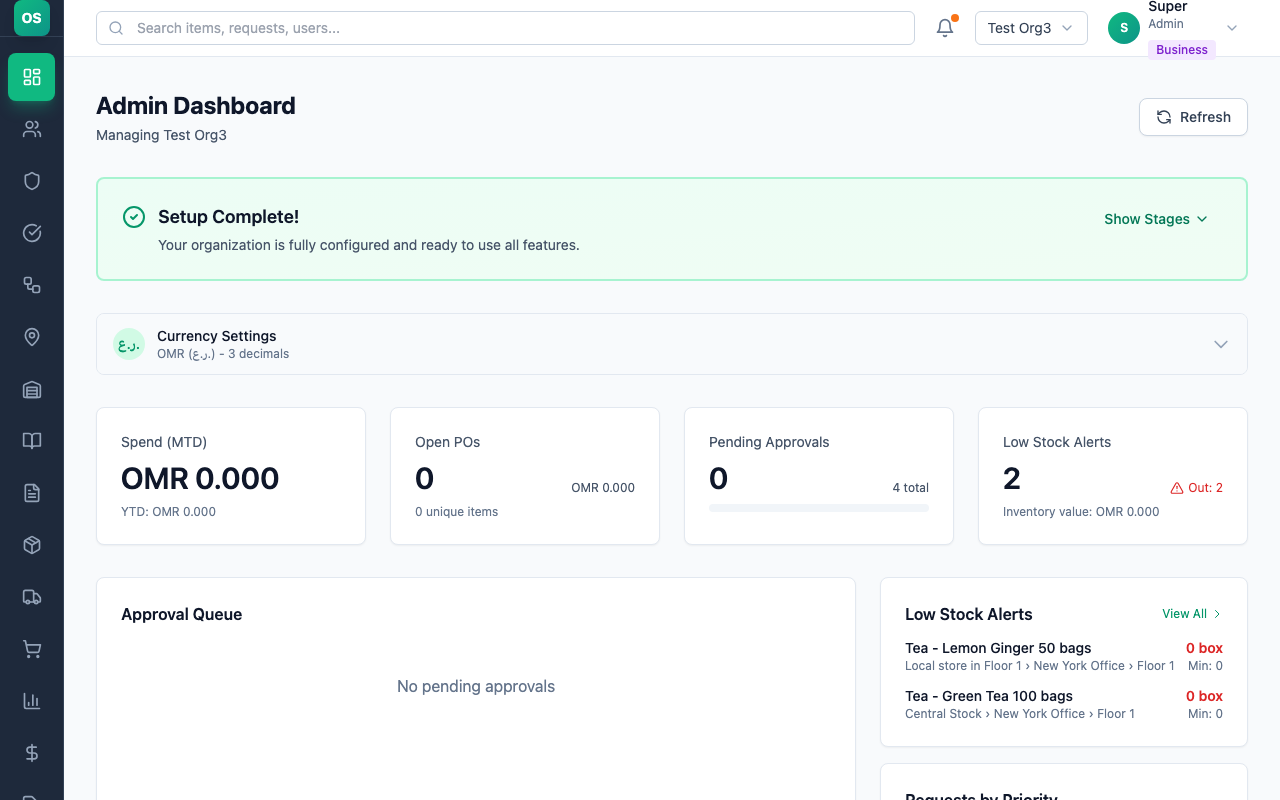
When you first log in to an already-configured organization, you'll see your personalized dashboard based on your role. The dashboard shows:
- Quick stats relevant to your responsibilities
- Recent activity
- Pending actions requiring your attention
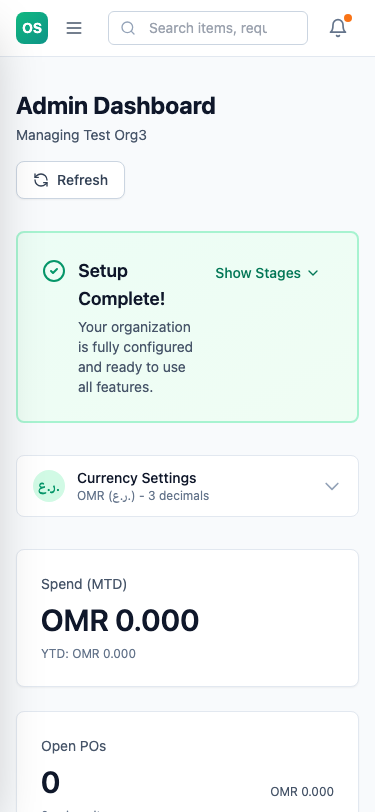
Screenshot: Admin dashboard with setup complete banner and currency settings

Understanding Your Role
OfficeStore uses role-based access to ensure everyone sees what's relevant to their job:
| Role | Who Uses It | Primary Tasks |
|---|---|---|
| Staff | All employees | Request supplies, track personal inventory |
| Approver L1 | Team leads, supervisors | Approve/reject requests from their teams |
| Approver L2 | Managers, department heads | Final approval for larger requests |
| Inventory Manager | Store keepers, stock controllers | Manage inventory, fulfill requests |
| Procurement | Purchasing officers | Order supplies from vendors |
| Admin | Office managers, IT | Configure system, manage users |
How OfficeStore Works
From central inventory to the hands of your team — the complete picture.
Organisation Structure
Store Coverage
Inventory Layer
500+ global templates
Min-level alerts
Full history
Select → Submit → Approve → Issue → Receive
Issue
User Roles
Roles are scoped per site & area. A staff member in the Cafeteria only sees Cafeteria items. An approver in Site A cannot approve Site B requests.
📋 Category Restrictions
Staff can be restricted to specific item categories — e.g. cleaning staff only see cleaning supplies.
For Staff Members
Real-Life Example: Maria, the Office Janitor
Maria is a janitor at a corporate office. She's responsible for keeping the 3rd floor clean and stocked with cleaning supplies. Here's how she uses OfficeStore:
Submitting a Request
Scenario: Maria notices the cleaning supply cabinet is running low on floor cleaner and paper towels.
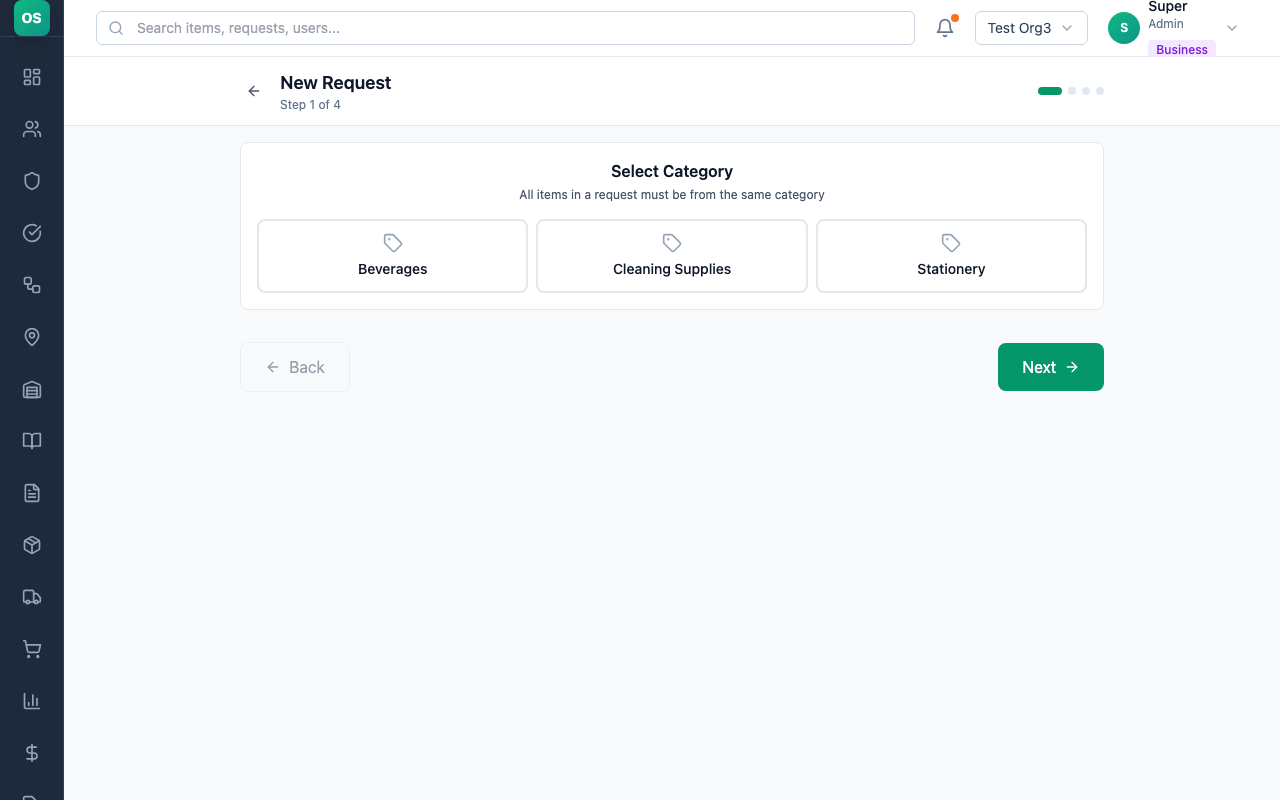
Step 1: Create a New Request
- From the dashboard, click New Request
- Select your Site (e.g., "Main Office Building")
- Select your Area (e.g., "3rd Floor")
Screenshot: Site and Area selection

Step 2: Add Items
- Browse categories or use the search bar
- Type "floor cleaner" to find the item
- Click Add and enter quantity (e.g., 5 bottles)
- Repeat for "paper towels" (e.g., 10 packs)
Screenshot: Adding items to request
Step 3: Review and Submit
- Review your items and quantities
- Set Priority (Normal for routine, High or Urgent for emergencies)
- Add notes if needed: "Running low, need before Monday"
- Click Submit Request
Screenshot: Request review and submit

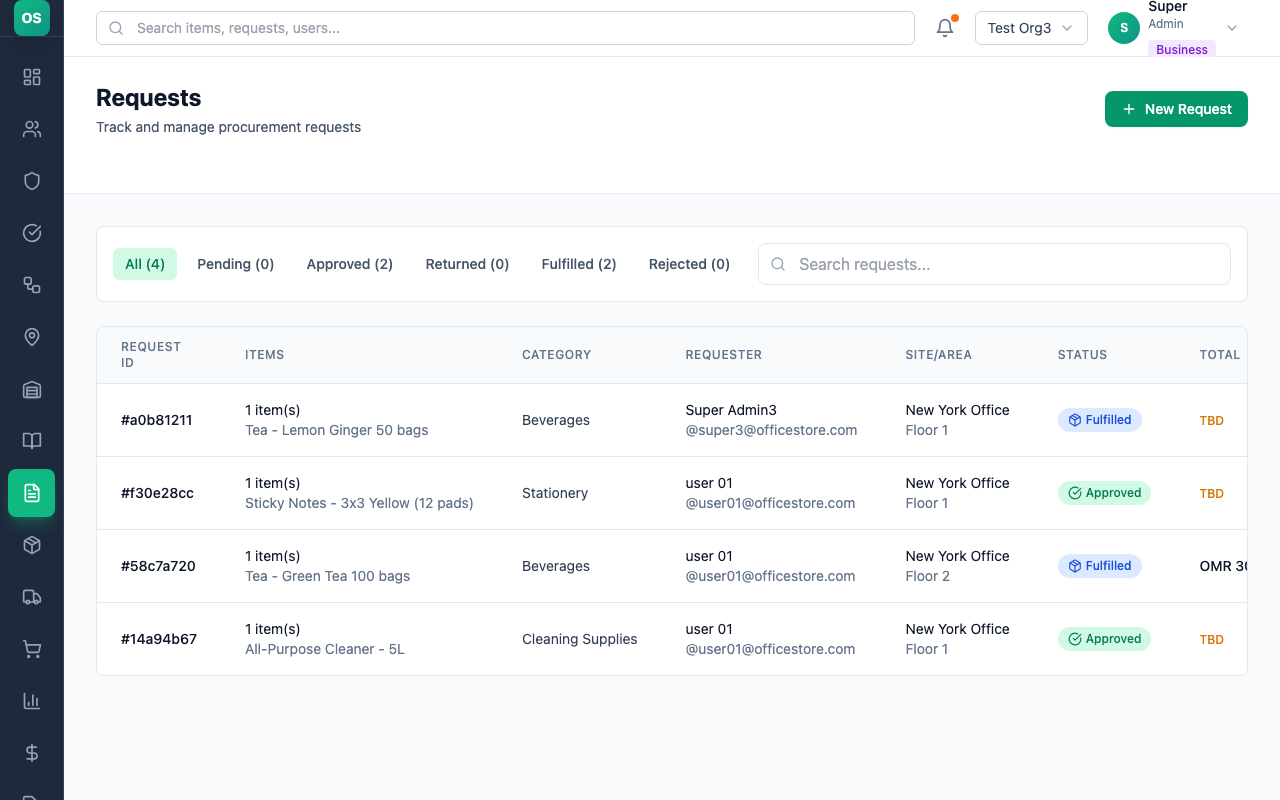
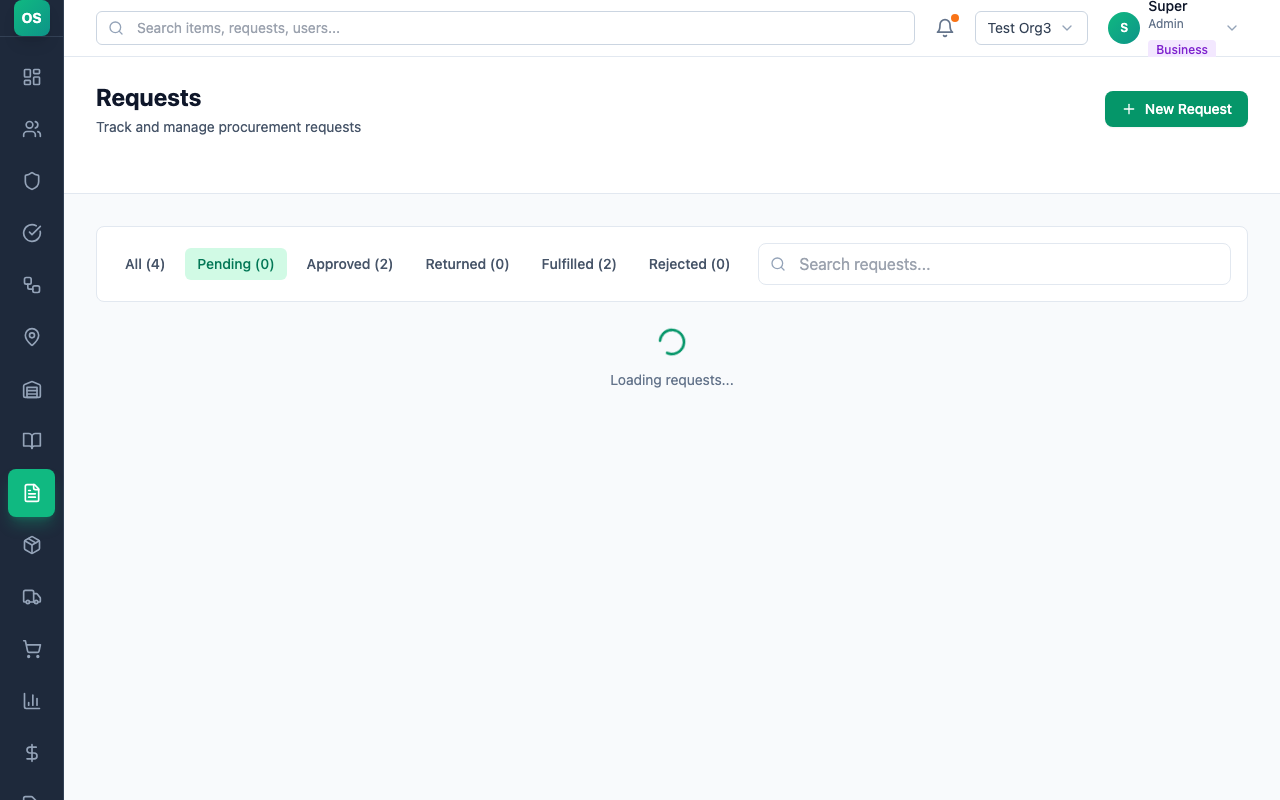
Tracking Your Requests
Maria can check the status of her requests anytime:
- Go to Requests from the navigation menu
- View all your submitted requests
- Check status: Pending → Approved → Fulfilled
| Status | What It Means |
|---|---|
| Pending | Waiting for approval |
| Approved | Approved, waiting for fulfillment |
| Rejected | Request denied (check comments for reason) |
| Returned | Sent back for changes (edit and resubmit) |
| Fulfilled | Items ready for pickup or delivered |
Screenshot: Request list with statuses
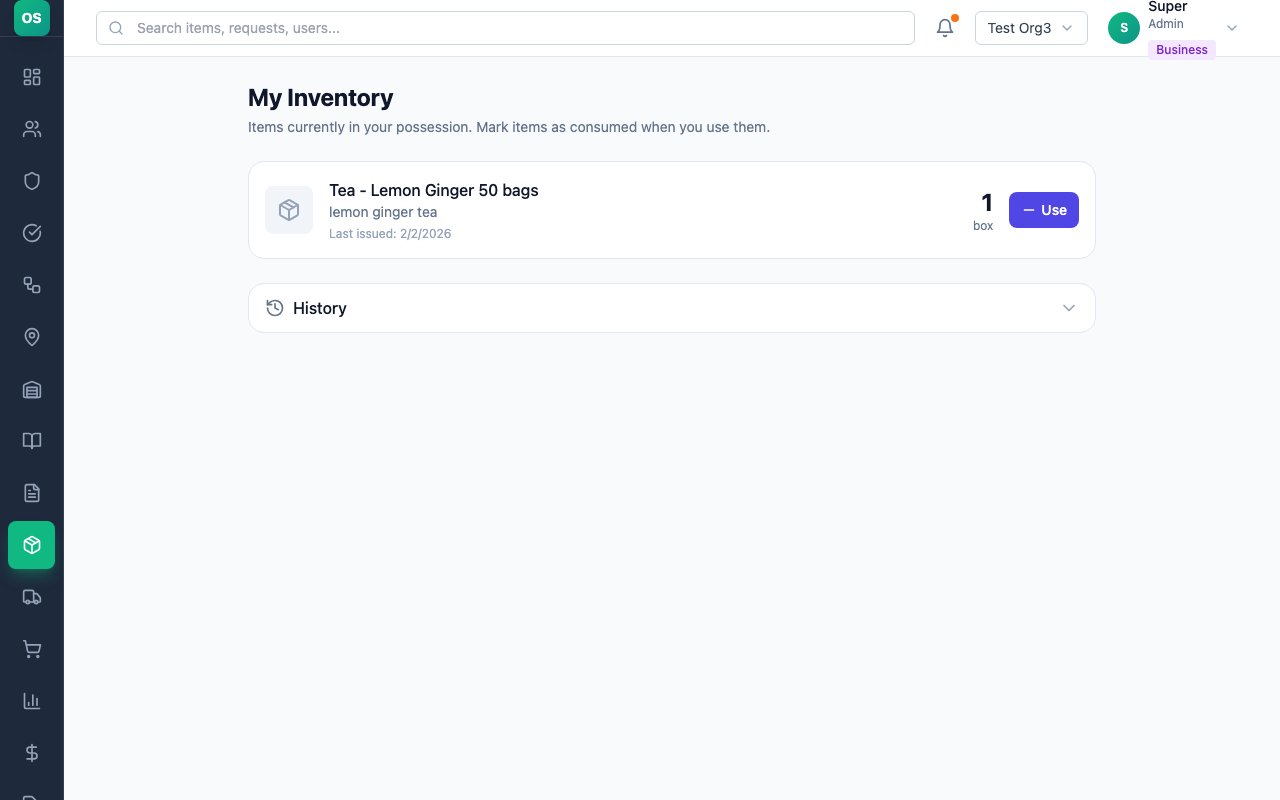
Managing Your Personal Inventory
Once Maria's request is fulfilled, the items appear in her My Inventory:
- Go to My Inventory from the navigation
- See all items currently in your possession
- View issue dates and quantities
Screenshot: My Inventory page

Recording Consumption
When Maria uses supplies, she can log consumption to keep accurate records:
- Find the item in My Inventory
- Click Record Consumption
- Enter quantity used and select category:
- "Used" - Normal usage
- "Discarded" - Expired or damaged
- "Returned" - Returning unused items
- Add notes if needed
- Click Save
Screenshot: Recording consumption
Quick Tips for Staff
- Check inventory before requesting - Your manager may have spare supplies
- Use accurate quantities - Don't over-order; request what you need
- Set appropriate priority - Reserve "Urgent" for true emergencies
- Add helpful notes - Help approvers understand your needs
- Track your consumption - Helps the organization plan better
For Approvers
Real-Life Example: David, Team Lead (Approver L1)
David manages the facilities team of 15 people across 2 floors. He reviews and approves supply requests from his team, including Maria.
Reviewing Pending Requests
Scenario: Maria submitted a request for cleaning supplies that needs David's approval.
Step 1: Access Approval Queue
- From the dashboard, see pending approvals count
- Click Requests in the navigation
- Filter by Pending Approval status
Screenshot: Approval queue

Step 2: Review the Request
- Click on Maria's request to view details
- Review: who submitted it, what items and quantities, priority level, any notes
Screenshot: Request details for approval
Step 3: Take Action
| Action | When to Use |
|---|---|
| Approve | Request is reasonable and within budget |
| Reject | Request is inappropriate or unnecessary |
| Return | Need more information or changes |
Screenshot: Approval actions

Quick Tips for Approvers
- Review promptly - Staff depend on timely decisions
- Check inventory first - Items may already be in stock
- Use Return wisely - Help staff improve requests instead of rejecting
- Add helpful comments - Guide your team on proper requesting
For Inventory Managers
Real-Life Example: Sarah, Store Keeper (Inventory Manager)
Sarah manages the central supply store for a 200-person office. She's responsible for fulfilling requests, maintaining stock levels, and ensuring items are always available.
Fulfilling Requests
Scenario: Maria's cleaning supplies request has been approved. Sarah needs to fulfill it.
Step 1: Access Fulfillment Queue
- Go to Fulfillment Queue from navigation
- See all approved requests waiting for fulfillment
- Filter by priority to handle urgent requests first
Screenshot: Fulfillment queue

Step 2: Check Stock Availability
Before fulfilling, verify items are in stock:
- Click on Maria's request
- Review items needed and stock availability
Screenshot: Stock availability check
Step 3: Fulfill the Request
If all items available:
- Click Fulfill Request
- Select the store to issue from
- Confirm fulfillment
- Items are deducted from inventory and added to user's "My Inventory"
Screenshot: Fulfillment confirmation

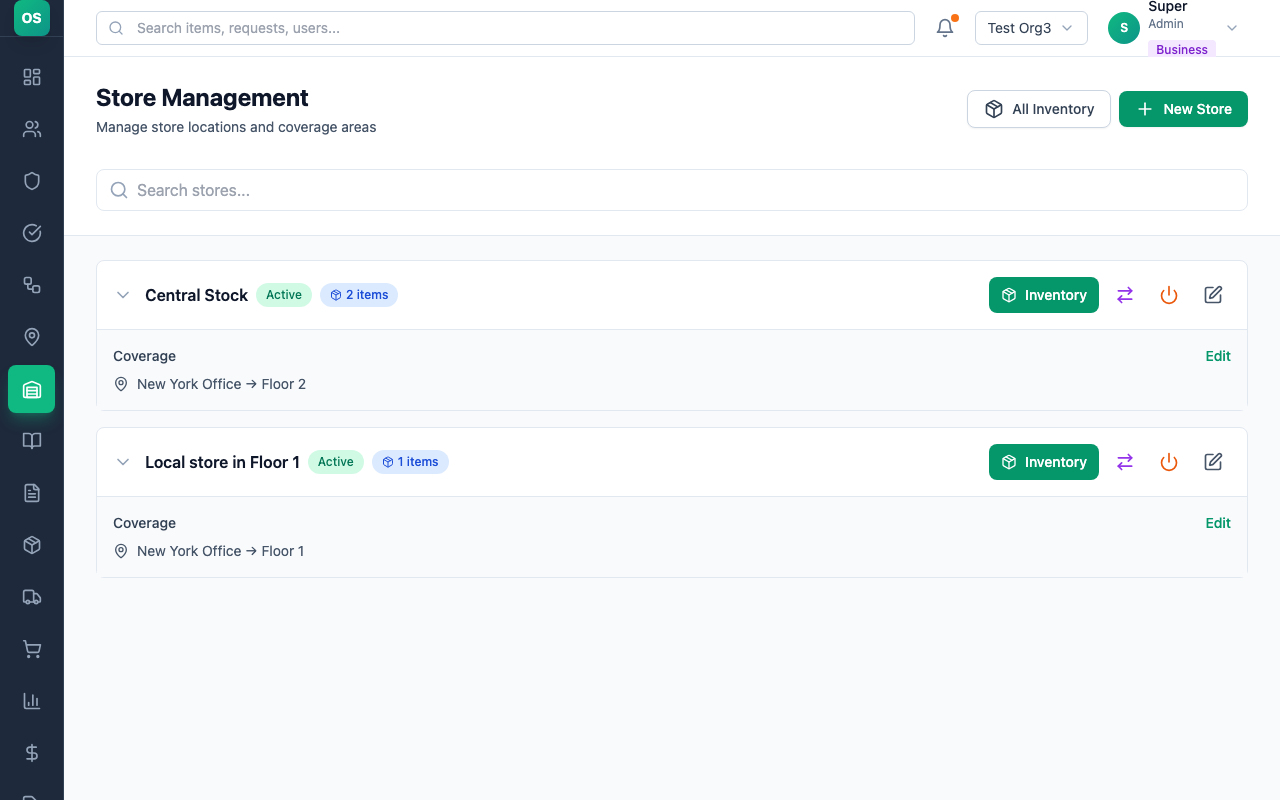
Managing Store Inventory
Checking Stock Levels:
- Go to Global Inventory for overview of all stores
- Or go to Stores → Select a store → View Inventory
- See all items with current quantities
Screenshot: Store inventory view
Low Stock Alerts
OfficeStore automatically monitors stock levels:
- Go to Low Stock Alerts
- See items below minimum threshold
- Take action: Create procurement request, transfer from another store, or adjust minimum levels
Screenshot: Low stock alerts

Quick Tips for Inventory Managers
- Process high-priority first - Sort queue by priority
- Keep accurate counts - Regular physical counts prevent discrepancies
- Set realistic minimums - Based on actual usage patterns
- Create procurement requests proactively - Don't wait until out of stock
For Procurement Officers
Real-Life Example: James, Procurement Officer
James handles purchasing for the organization. When stores run low, he creates bulk orders to vendors and manages the receiving process.
Creating a Procurement Request
Scenario: Sarah flagged that paper towels are running low. James needs to order more from the supplier.
Step 1: Create New Procurement Request
- Go to Procurement Requests from navigation
- Click New Procurement Request
- Select vendor/supplier (or leave blank for general)
Screenshot: New procurement request

Step 2: Add Items
- Search for items to order
- Add "Paper Towels" - Quantity: 100 packs
- Add other low-stock items
- Review total value
Screenshot: Adding procurement items
Tracking Procurement Status
| Status | What It Means | Next Action |
|---|---|---|
| Pending | Awaiting approval | Wait for approvers |
| Approved | Ready to order | Place order with vendor |
| Ordered | Sent to vendor | Wait for delivery |
| Received | Items arrived | Update store inventory |
Quick Tips for Procurement
- Batch orders when possible - Better discounts, fewer shipments
- Track vendor performance - Note delivery times and quality
- Plan ahead - Use consumption data to predict needs
- Verify on receipt - Check quantities match order before confirming
For Administrators
Real-Life Example: Rachel, Office Manager (Admin)
Rachel is responsible for setting up and maintaining OfficeStore for her 300-person company across 3 office locations.
First-Time Setup: Onboarding Wizard
When you create a new organization or first log in as an administrator, OfficeStore guides you through an onboarding wizard to set up the essentials:
Setup Stages:
1. Organization Details
- Organization name
- Industry type
- Organization size
2. Currency Configuration
- Select your organization's currency (USD, EUR, GBP, OMR, etc.)
- Choose decimal places (0-3 decimals)
- Example: OMR (ر.ع.) with 3 decimals for Omani Rial
3. Create Your First Site
- Add your primary office location
- Add initial areas (departments, floors, sections)
4. Set Up Central Store
- Automatically created to cover all sites
- Serves as your main inventory location
5. Add Catalogue Items
- Import items from CSV template
- Or manually add your first items
6. Invite Team Members
- Add initial users with appropriate roles
- Send email invitations
Completion Indicator
Once setup is complete, you'll see a green success banner on your dashboard:
✅ Setup Complete!
Your organization is fully configured and ready to use all features.
You can review setup stages anytime by clicking "Show Stages" on the dashboard.
Configuring Currency Settings
Currency settings determine how prices and costs are displayed throughout the system.
Setting Currency (During Onboarding)
During initial setup, you'll select:
- Currency: Choose from 150+ supported currencies
- Decimal Places: 0-3 decimals based on your currency
- USD/EUR: Typically 2 decimals ($5.99)
- OMR/KWD: Often 3 decimals (ر.ع. 5.995)
- JPY/KRW: Usually 0 decimals (¥599)
Changing Currency (After Setup)
- Go to Dashboard
- Find Currency Settings card
- Click to expand settings
- Select new currency and decimal places
- Save changes
Important Notes
- Currency changes affect all prices in the system
- Existing price values are not automatically converted
- Update catalogue item prices manually after currency changes
- All users see prices in the organization's configured currency
Initial Setup Checklist
After completing the onboarding wizard, verify these configurations:
- ✅ Currency Settings - Confirmed and correct
- ✅ Sites and Areas - All locations added
- ✅ Central Store - Created automatically
- ✅ Catalogue Items - Initial items imported
- ✅ Users - Team members invited
- ✅ Approval Workflows - Configure if needed
- ✅ Roles and Permissions - Set up for Enterprise plans
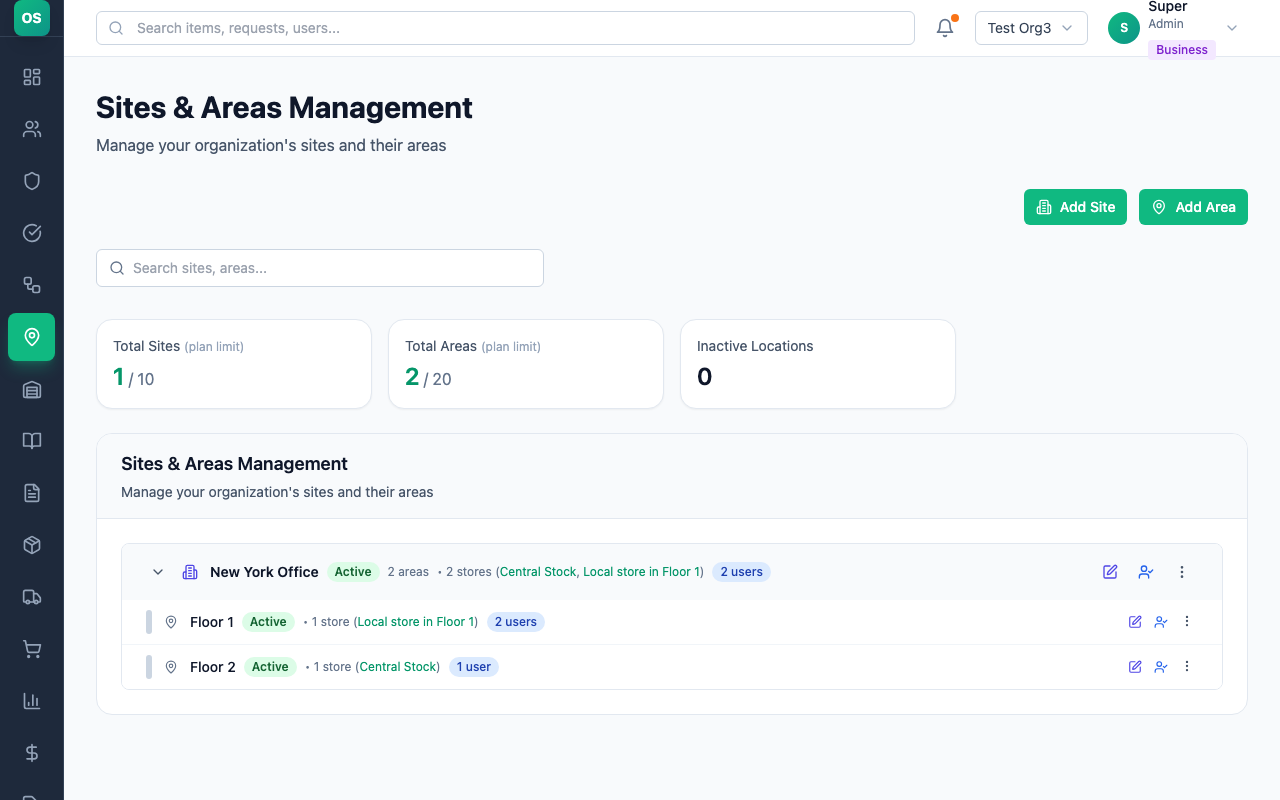
Managing Sites and Areas
Creating a Site:
- Go to Settings → Sites
- Click Add Site
- Enter site name (e.g., "Headquarters")
- Add address and details
- Save
Screenshot: Add site
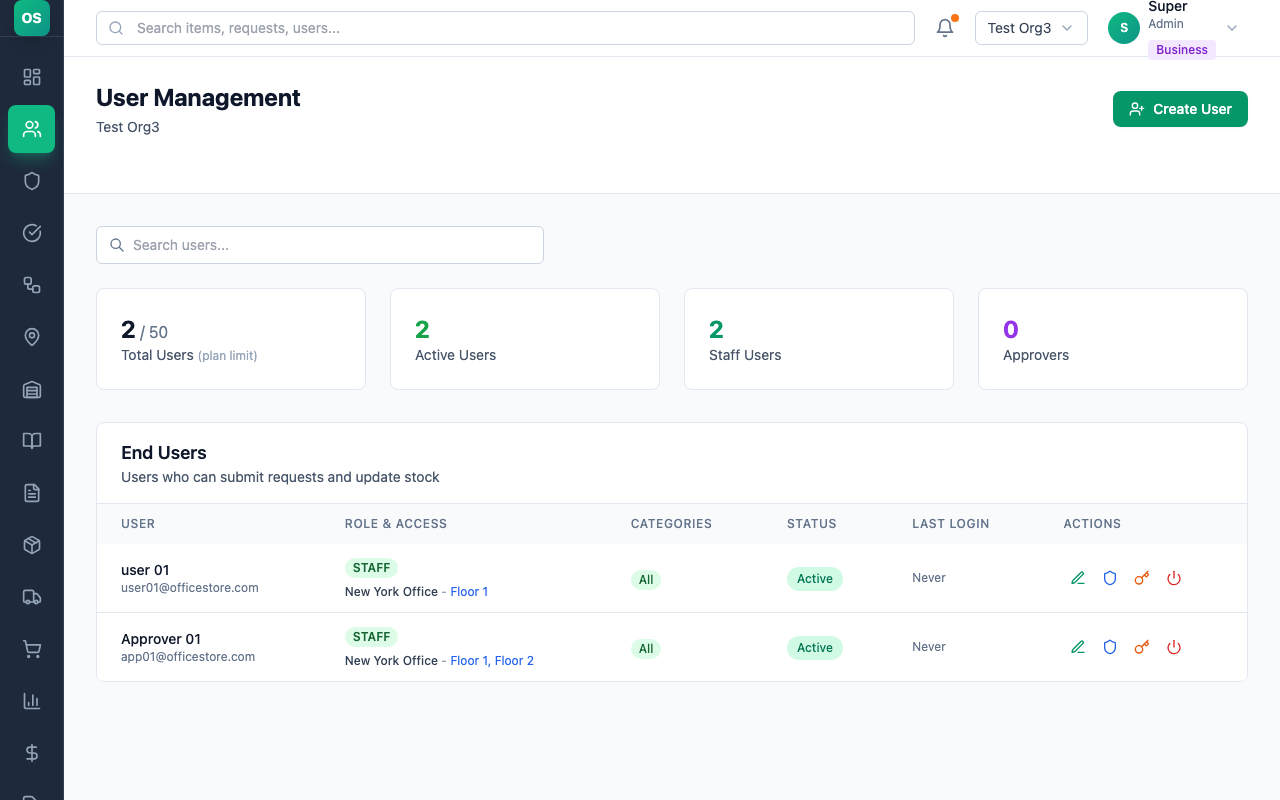
Managing Users
Adding Staff Users:
- Go to Settings → Users
- Click Add User
- Enter details: Name, Email, Role (Staff, Approver L1, etc.), Site/Area access
- User receives email invitation
Screenshot: Add user
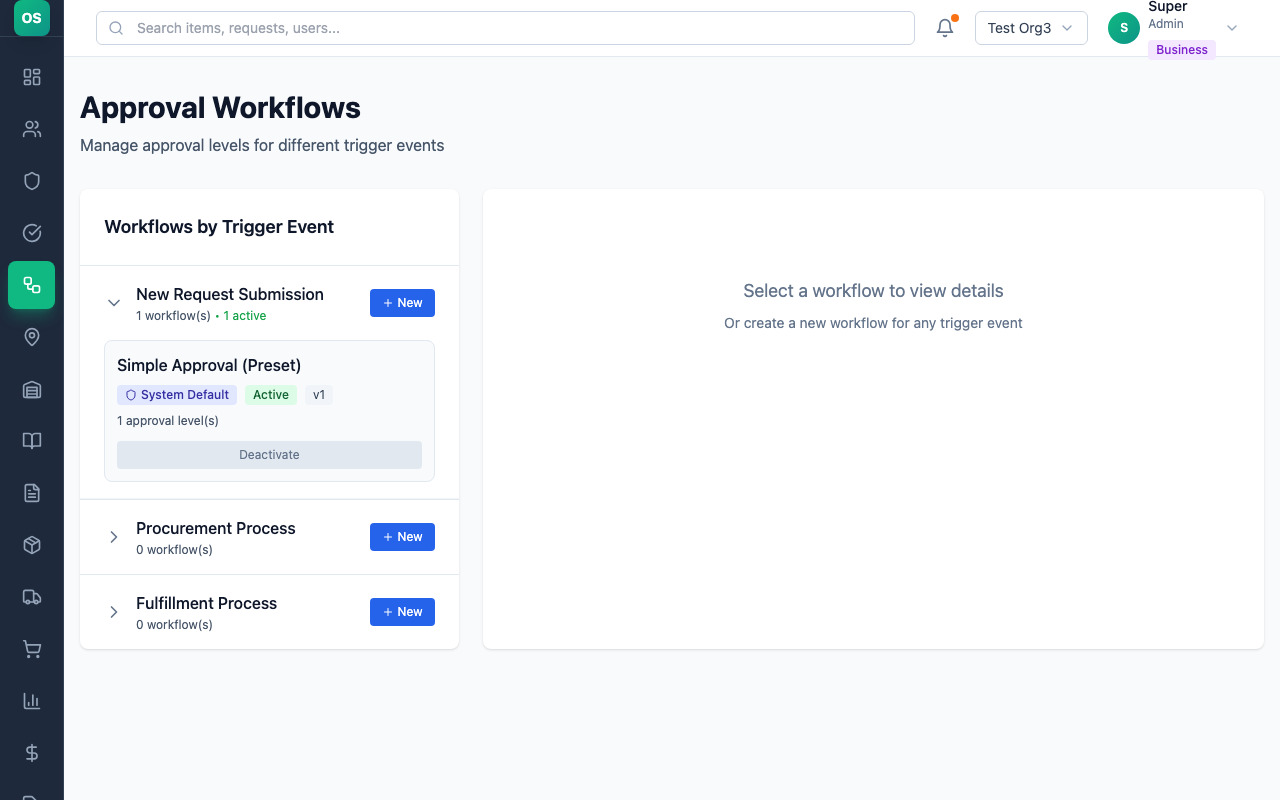
Configuring Approval Workflows
Creating a Workflow:
- Go to Settings → Approval Workflows
- Click New Workflow
- Configure: Name, Trigger, Levels (Approver L1, Approver L2), Apply to categories
- Activate workflow
Screenshot: Workflow configuration
Quick Tips for Admins
- Start simple - Add complexity as needed
- Train users - Provide this guide to all staff
- Review workflows quarterly - Adjust as organization changes
- Monitor reports - Identify trends and issues early
- Keep catalogue updated - Remove discontinued items, add new ones
Mobile Access
Accessing on Mobile
OfficeStore works on any mobile browser:
- Open your phone's browser
- Go to your organization's OfficeStore URL
- Log in with your credentials
- Full functionality available on mobile
Screenshot: Mobile view
Frequently Asked Questions
Q: I forgot my password. How do I reset it?
A: Click "Forgot Password" on the login page. You'll receive an email with reset instructions.
Q: Why was my request rejected?
A: Check the request details - the approver should have added a comment explaining why. Common reasons: items in stock, exceeded budget, duplicate request.
Q: Can I edit a submitted request?
A: You can only edit requests that have been "Returned" by an approver. For pending requests, contact your approver.
Q: Where do I pick up fulfilled requests?
A: Check the fulfillment notification - it will indicate which store to collect from. Or ask your inventory manager.
Q: I need to return unused items. How?
A: Go to "My Inventory", find the item, click "Record Consumption" and select "Returned" as the category.
Admin & Setup Questions
Q: Can I change the currency after initial setup?
A: Yes. Go to your Dashboard, find the "Currency Settings" card, and select a new currency and decimal places. Note that existing prices won't be automatically converted - you'll need to update catalogue item prices manually.
Q: I skipped some steps in the onboarding wizard. Can I go back?
A: Yes. You can complete any skipped steps from the dashboard. Click "Show Stages" on the setup completion banner to see what still needs to be configured.
Q: What happens to my data if I change the currency?
A: Currency changes only affect how prices are displayed. All existing price values remain the same numerically. For example, if you change from USD to EUR, $100 will display as €100. You should manually update catalogue prices to reflect actual costs in the new currency.
Q: Can I have different currencies for different sites?
A: No. OfficeStore uses a single organization-wide currency. All prices, costs, and reports use this currency across all sites and stores.
Q: How do I complete the onboarding wizard?
A: The wizard guides you step-by-step through: (1) Organization details, (2) Currency settings, (3) Creating your first site, (4) Setting up the central store, (5) Adding catalogue items, and (6) Inviting users. You can skip optional steps and return later.
Getting Help
- In-app help: Click the help icon (?) on any page
- This guide: Bookmark for quick reference
- Admin support: Contact your organization's OfficeStore admin
- Technical support: [email protected]